Wednesday, December 29, 2010

Introducing Party Points - Our New Loyalty Rewards Programme 
Image from LilyBel studio
Party Points is our new loyalty programme, effective from December 25th 2010 and is designed to reward and thank you for you for shopping with us!  I have sooo many loyalty cards in my wallet for clothes shops, supermarkets and cafes (I have A LOT of those due to my caffeine addiction!) that I decided our customers should receive the same benefit, when buying party goodies and supplies from LilyBel Studio. It's simple and easy to use and here's how it works, when you make a single purchase with us of $50 or more you earn a $5 discount on your next purchase, which is automatically credited to your account. The more you spend per purchase the more Party Points you earn and in turn the more credit you'll receive on your account.

Purchase Points Credit
$0-$49 0 0
$50-$99 50 $5
$100-$149 100 $10
$150-$199 150 $15
$200-$249 200 $20

And because you shop online with us your points are electronically saved and stored, so that's one less 'loyalty card' you have to fit into your wallet and carry around with you! Better yet there's no expiry date on the credit you earn, it will simply remain on your account until your ready to use it. And just because I think all our fabulous customers deserve the best deal possible, I will even reward you with Party Points on our sale items!

 Happy Shopping! xx

Terms and conditions of Party Points can be found on our homepage at www.lilybel.co.nz

Tuesday, December 28, 2010

Bakers Twine - New In Stock  
Now in stock from the US is our soft, 100% cotton bakers twine in the following 8 delicious colours, maraschino red, mandarin orange, lemondrop yellow, peapod green, lilac, caribbean aqua, pink sorbet and cappuccino brown. These gorgeous bright, candy striped twines are perfect for tying our LilyBel Studio gift tags to our party bags, jelly pails or noodle boxes. They also look great tied around gifts and can be used on your party table in a variety of ways...you're only limited by your imagination!
Each yummy colour is sold in 2 metre lengths and retails at LilyBel Studio for $1.
                               
 Happy Shopping! xx

Sunday, December 26, 2010

Part Two

Chocolate fudge Ladybug cupcakes

For the cupcakes I used a chocolate fudge recipe and baked half the batch in black shiny foil cupcake cases and the other half in red shiny foil cases. For the icing I needed a true white colour so, I made a buttercream icing using crisco and no colour butter flavouring. I swirled the buttercream icing on to each cupcake, sprinkled on white shimmer dust and decorated them with sugar ladybugs and red and black fondant flowers I'd made with the silicone blossom mould. To finish I placed a 'Ladybug Hug' cupcake topper from our range into each cupcake.
Can you tell I've got a serious sweet tooth??, I know I've only shared photos of some of the sweet goodies from the food table and not the savoury...but life's too short for savoury!
Personalized miniature lemonade bottles
I personalized a small bottle of lemonade for each little guest, using 'belli bands' in the red and white polka dot paper (these will be available at LilyBel Studio soon!) and added a cute wooden ladybug by their names. The gorgeous red and white paper drinking straws (these will also be available very soon at LilyBel Studio in a wide range of colours) were tied to the bottles using red and black satin ribbons. The bottles were really easy and quick to put together and looked great lined up on the party table, I don't think I've seen little people so excited over a drink before!
Tissue blossoms
For room decor I added red, black and white tissue blossoms from our range. I hung these from the ceiling in groups of the 3 colours in small, medium and large and as they are hung with thin, transparent nylon they looked like they were 'floating' and were super pretty.
Tissue blossom pots
 I also used the tissue blossoms to create flower blossom pots by placing the small and medium sized tissue blossoms on top of red and black jelly pails, which are also available at LilyBel Studio. I finished these off by putting little wooden ladybugs through the blossoms and placed the flower pots throughout the party room on tables...they looked pretty cute and fitted our 'Ladybug Hug' theme perfectly!
Ladybug themed balloons from LilyBel Studio
I helium filled a range of our balloons including the red and black polka dot, red and white polka dot, the large foil ladybug and plain red, black and white balloons. These I grouped together and had coming out of the centre of the flower pots mentioned above, as well as floating freely on the ceiling with pretty long lengths of curling ribbon attached to them. All our balloons come with co ordinating 1 metre lengths of curling ribbon, so you don't have to run around finding curling ribbon to match.
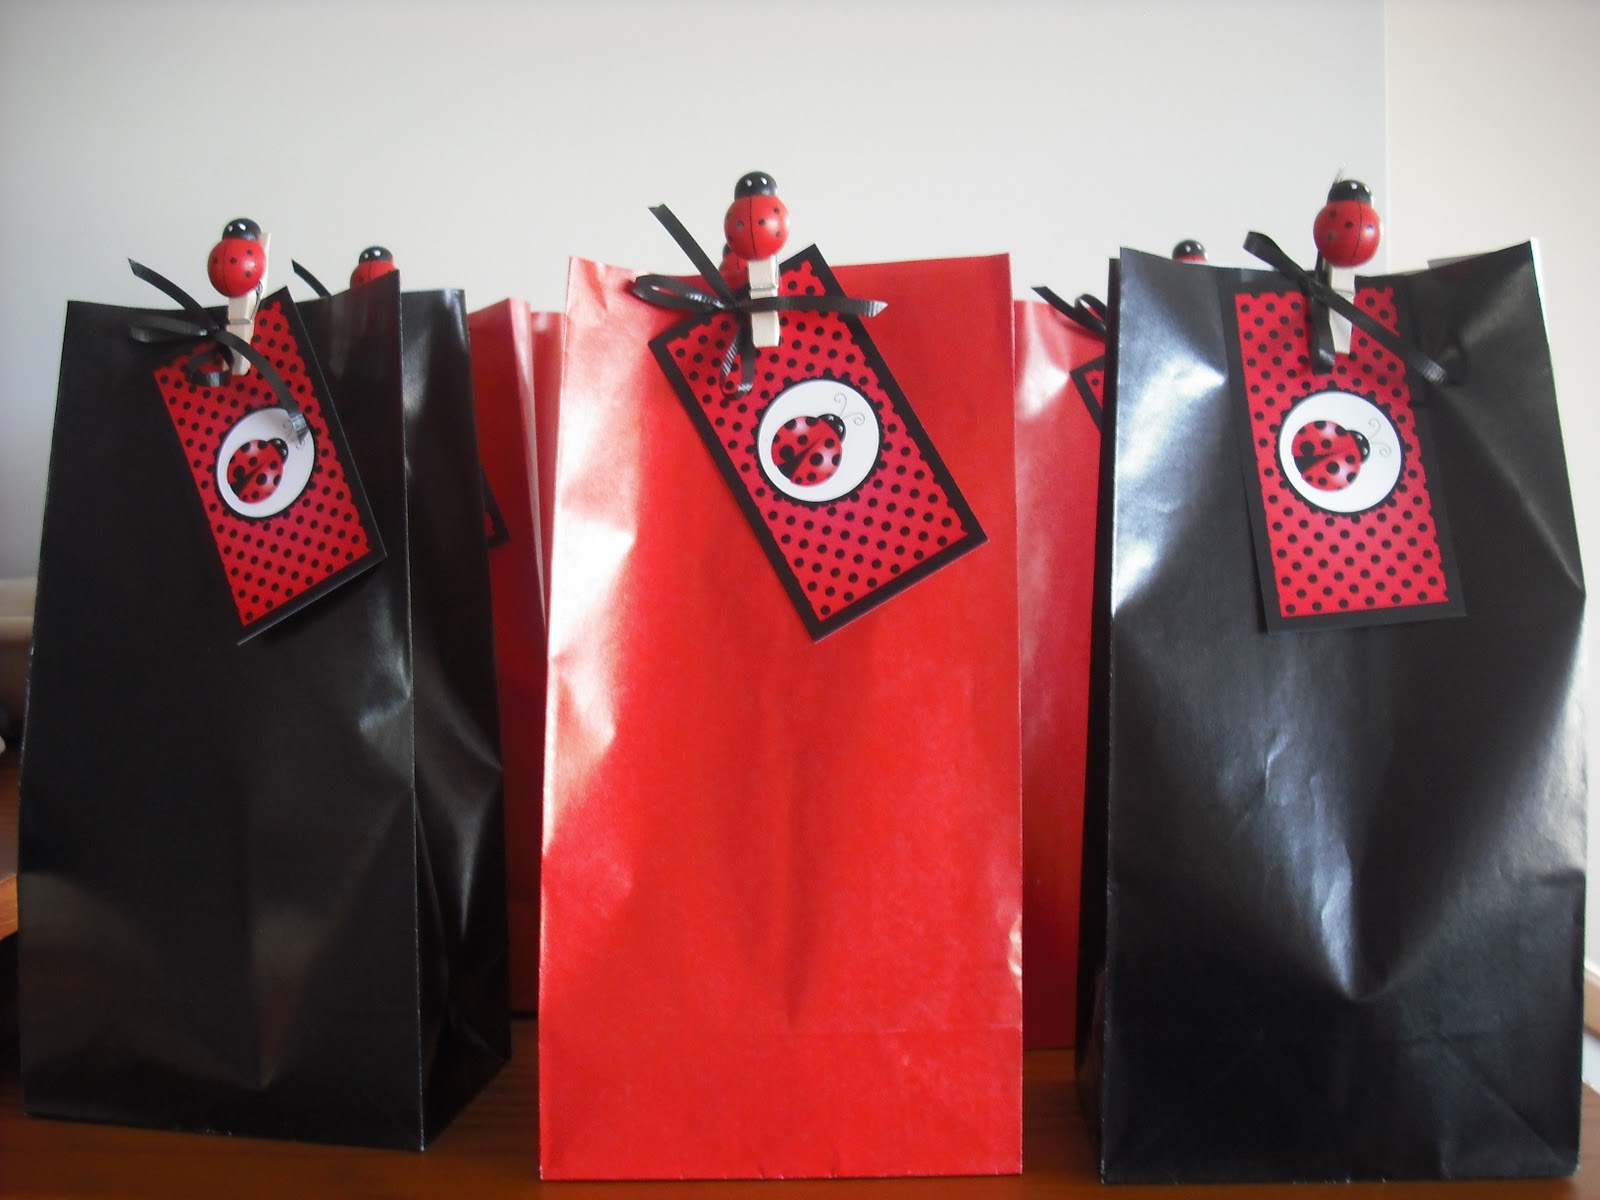
Little guest's goody bags
 So, when the party was coming to an end I had these cute goody bags ready to give to each little guest as they left. I used the glossy black and red party bags from our range and attached our 'Ladybug Hug' tags to the bags, with mini pegs decorated with wooden ladybugs...super simple but very effective!.

Ladybug Hug party tags from LilyBel Studio
Once the last goody bag had been handed out and everyone had left I collapsed with a double shot flat white (I'm also a caffeine addict) and a left over brownie...bliss!!


Saturday, December 25, 2010

Ladybug Hug Party
Front and back of the 'Ladybug Hug' invitation From LilyBel Studio 

Welcome to the first post on the LilyBel Studio blog. I've decided to start with a little party I recently had for my twin girls 3rd birthday...I say little, but as always the guest list grew and by the morning of the party I was pulling my hair out and vowing to make next year's celebration smaller!
I decided to use my 'Ladybug Hug' theme from LilyBel Studio, as I thought it would be nice to use and work with the bold combination of red, white and black for a change. I started by sending out our 'Ladybug Hug' invitations in their bright red envelopes with matching envelope seals.
Anyway, semi meltdown and general preparation madness aside, the girls had a great time and that's really what it's all about!
The 'cake'...
The cake...hmmm on reflection not such a great idea to take this project on myself as I'm certainly not a professional cake decorator. The truth is I've never even taken a class but then that's probably pretty obvious looking at the cake, I'm just stubborn and decided to have a go myself! I covered the cake with red ready to roll pettinice fondant and cut out circles in the black fondant to create the ladybug spots. The white blossoms were made by pressing fondant into a silicone blossom mould and adding white sugar pearls as the flower centre. I got the ready to roll fondant and silicone blossom mould from Sandra at KiwiCakes. The super cute ladybugs were made out of sugar and I got them online at shopbakersnook in the States. To finish I added a black satin ribbon trim at the base of each cake.
Flower cookie pops
 These flower cookie pops were easy to make and proved very popular. I used a basic sugar cookie recipe and rolled the dough a little thicker than usual before cutting out the flower shapes. I found it easiest to insert the lollipop sticks as soon as the cookies came out of the oven, as they're still nice and soft at this stage. To help each lollipop stick stay in the cookie I dipped the end of each stick in royal icing first before inserting it so that as the cookie cooled and hardened so did the royal icing and it acted like a glue. To decorate them I used white marshmallow fondant icing that I made, as this tastes sooo much nicer than regular fondant for little people (and big people actually...), which I then brushed with shimmer dust before adding the sugar ladybugs. These cookie pops are fantastic on a party table but are also perfect as a 'thank you' gift for each little guest, simply pop into a cello bag tie the end with ribbon and attach a 'Ladybug Hug' gift tag from our range.
Fondant Ladybug sugar cookies
These ladybug cookies were also made from a basic sugar cookie recipe and I covered them in red and black marshmallow fondant. I layered the mmf fondant so the ladybugs had a slight 3D effect to them and finished them off with red and black glitter dust. These little cuties didn't seem to hang around on the plate for too long either, but then what little person doesn't love a cookie??!!